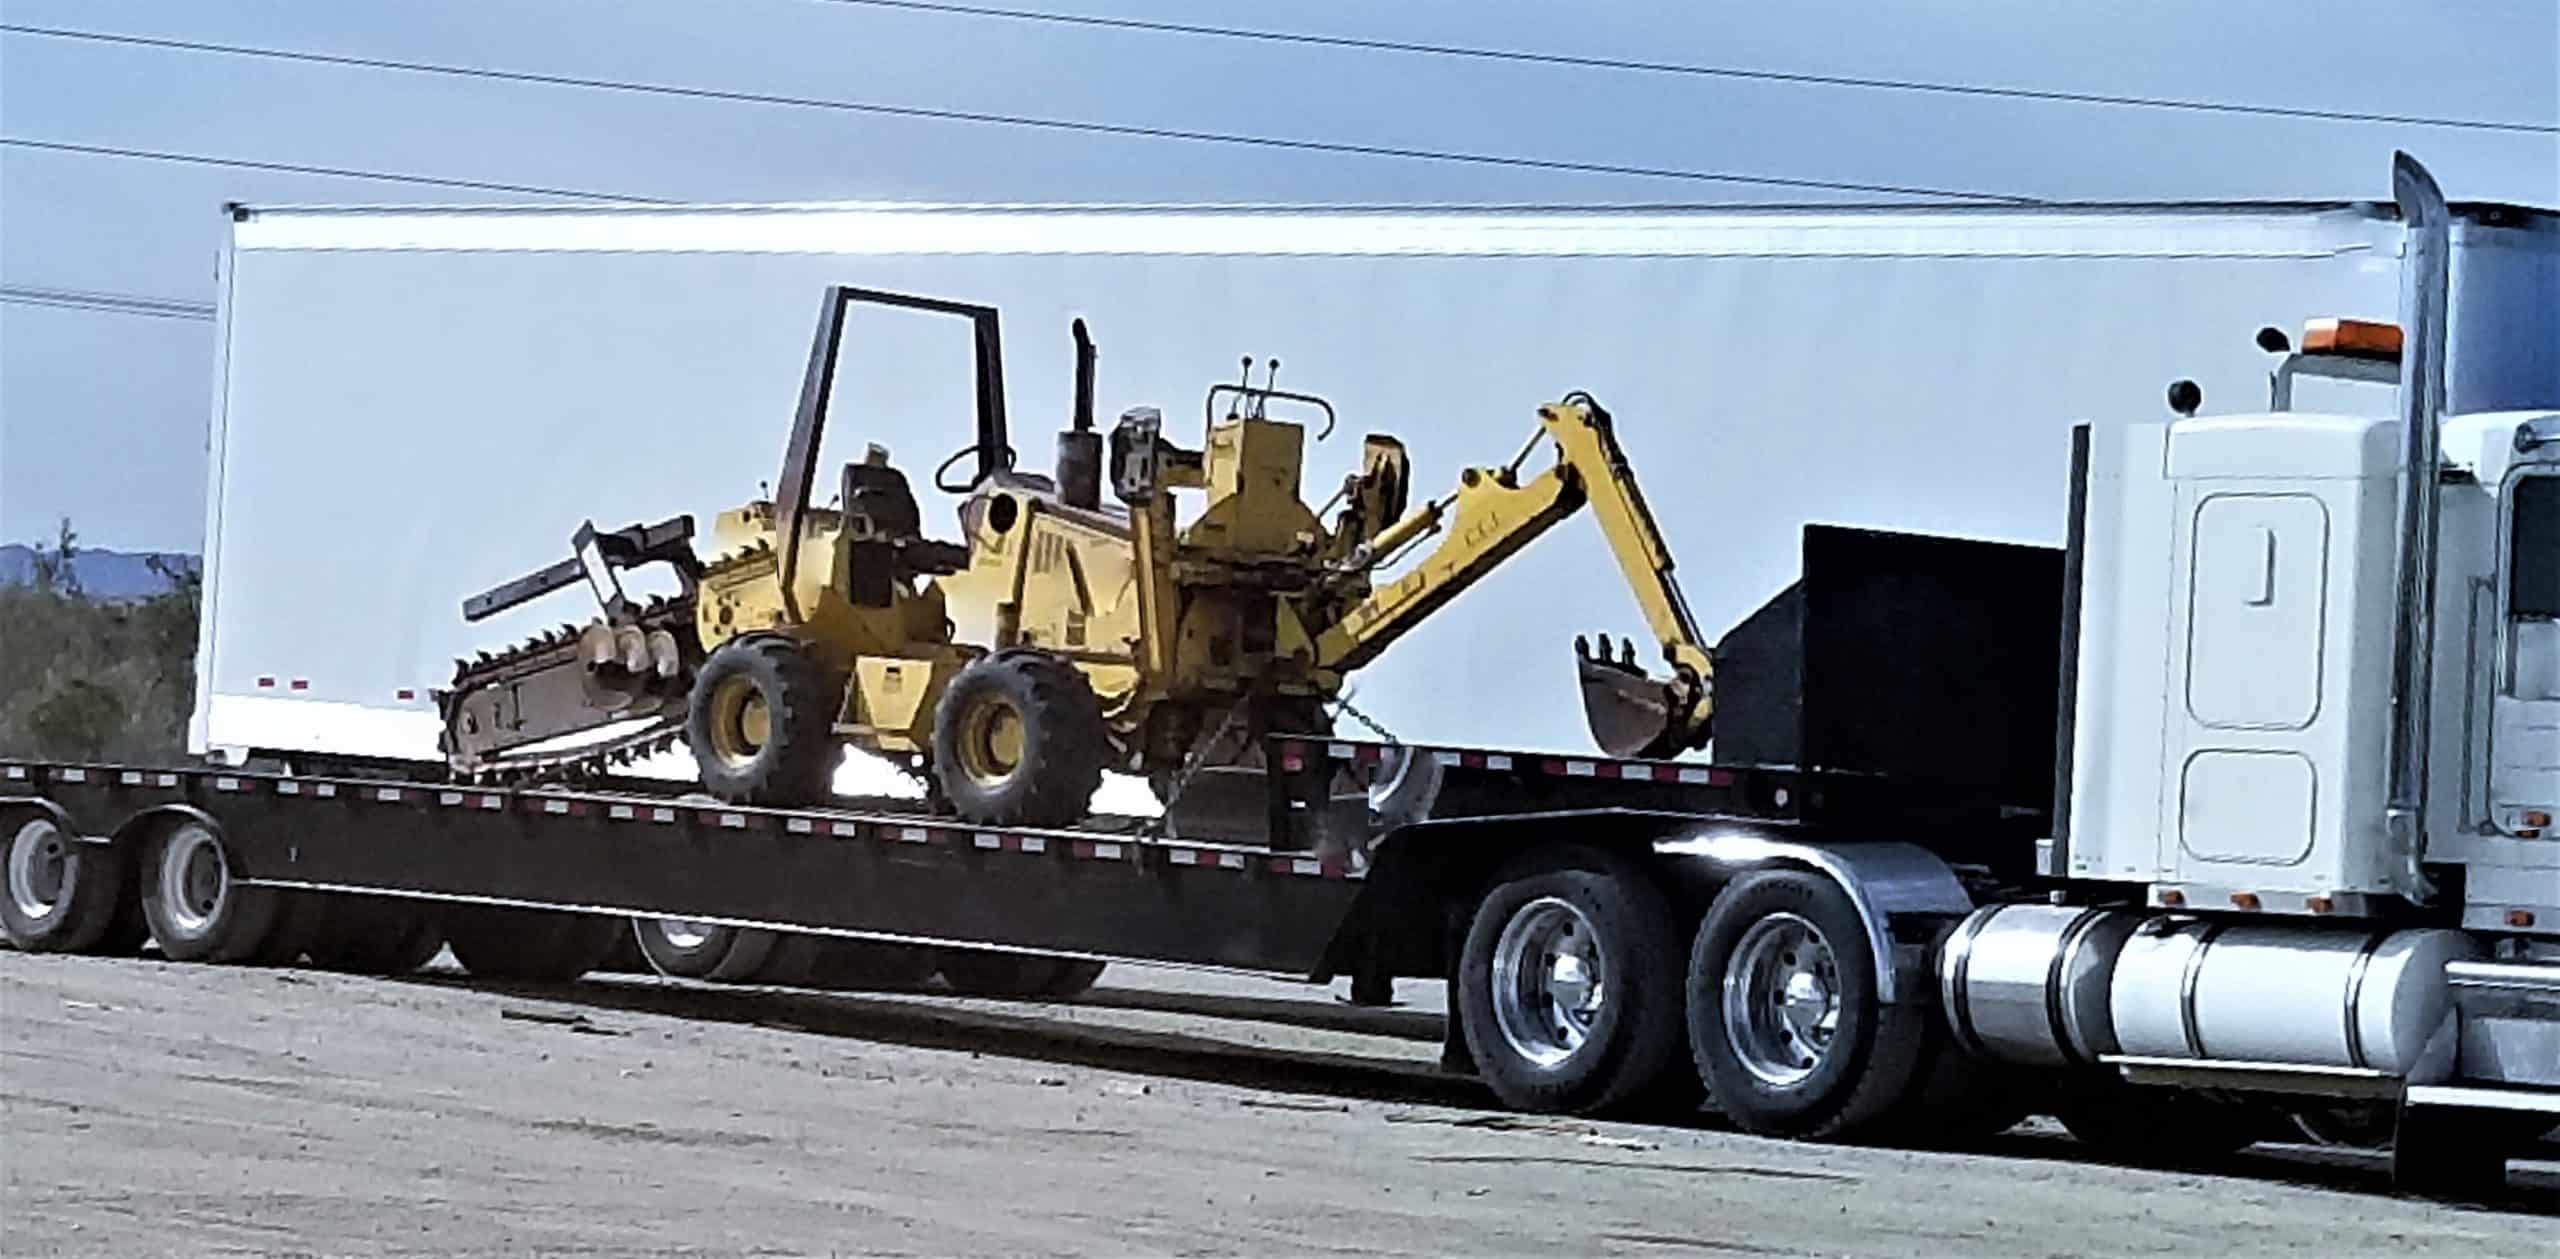
How to Transport a Mini Excavator Safely in NSW: Legal Requirements and Best Practice
Most tradies and landscapers moving mini excavators between job sites have no idea they’re personally liable under Australian law. Under Australia’s Chain of Responsibility laws, every party involved in transporting heavy equipment shares legal responsibility for ensuring loads are secured correctly and comply with weight limits. This includes the driver, loader, and business owner. Get load securing wrong, and you’re facing significant fines that can reach thousands of dollars per offence, depending on the severity of the breach. The rules tightened in 2018 with the updated Heavy Vehicle National Law, enforcement efforts have increased substantially in recent years, and “that’s how we’ve always done it” isn’t a defence that holds up in court.
Important note: Regulations, fees, and penalty amounts change frequently. While this guide reflects current requirements at the time of writing, always verify information with Transport for NSW, the NHVR, or other official sources before transport. Individual circumstances vary, and this guide does not constitute legal advice.
This comprehensive mini-excavator transport guide covers everything NSW operators need to know about legally and safely hauling compact excavators. If you’re still exploring whether a mini excavator suits your work, start with our guide to mini excavator uses and benefits. You’ll learn how to choose the right trailer for your machine’s weight class, understand exactly how many chains you need and where to attach restraints, and know when hiring a tilt tray service makes more sense than self-transport. Whether you own a compact 1.7-tonne machine or a versatile 5-tonne excavator, you’ll find specific, practical guidance backed by Australian regulations rather than generic advice copied from American websites that reference DOT rules irrelevant to NSW roads.
This guide draws on over 50 years of practical machinery transport experience from dealers and operators across NSW who have seen every transport scenario go right and wrong. The advice here keeps you compliant, your earthmoving equipment protected, and your business running without unexpected roadside surprises from Transport for NSW inspectors.
Understanding Your Mini Excavator’s Transport Weight
Everything about transporting your mini excavator depends on one number: weight. The trailer you need, the licence required, the number of tie-downs, and whether you can legally tow the machine at all are determined by this single figure. Yet many operators have never actually checked their machine’s exact transport weight. They eyeball the excavator, figure “she’ll be right,” and hope for the best. That approach leads to overloaded trailers, under-restrained loads, and explaining yourself to an inspector at a roadside weigh station.
Why Your Machine’s Exact Weight Determines Everything
Your excavator’s operating weight isn’t a rough estimate. The operating weight is a precise figure listed on pages 3-5 of your operation and maintenance manual, or on the compliance plate mounted near the operator’s station. A mini excavator, also called a compact excavator or mini digger, typically weighs between 1,000kg and 6,000kg and is the most common earthmoving machine used by landscapers, tradies, and small construction operators across NSW. But “mini” is misleading terminology. A 5-tonne machine is anything but small when you’re trying to load that excavator onto an undersized trailer.
Here’s what catches people out: the weight in the sales brochure is usually the base machine without attachments. Add a 300mm trenching bucket, and the excavator’s weight increases by 45-80kg. Swap to a 450mm GP bucket, and the machine gains another 65-120kg. Throw on a hydraulic breaker, and the excavator adds another 150-280kg, depending on the breaker model. That “4.5-tonne” excavator is suddenly pushing 4.8-5.0 tonnes, and your carefully calculated trailer capacity is now borderline illegal.
What’s the transport weight of common mini excavator models?
Kobelco mini excavators range from the compact 1-tonne SK008 through to the versatile 5-tonne SK55SRX, each with manufacturer-specified tie-down points for safe transport. Here are the actual weights you’ll be dealing with when relocating excavator machinery:
The SK008 micro class machine has an operating weight of 1,065kg. Add a standard bucket at 20-35kg, and you’re looking at approximately 1,085-1,100kg transport weight.
The SK17SR in the 1.7-tonne class has an operating weight of 1,720kg. With a standard bucket adding 45-65kg, expect approximately 1,765-1,785kg transport weight.
The SK35SR in the 3.5-tonne class has an operating weight of 3,890kg. A standard bucket adds 85-130kg, bringing transport weight to approximately 3,975-4,020kg.
The SK55SRX in the 5-tonne class has an operating weight of 5,095kg. With a standard bucket adding 120-180kg, the transport weight reaches approximately 5,215-5,275kg.
Mini Excavator Weight Classes: A Quick Reference
For transport planning purposes, think in weight classes rather than marketing categories.
Under 1.5 tonnes (1,000-1,500kg): The genuinely compact machines like the Kubota U10-5, Bobcat E10, or Kobelco SK008 fall into this lightweight category. These small excavators fit on lighter 2,500kg ATM trailers and are the easiest machines to move between sites. A Toyota HiLux or Ford Ranger with a tandem trailer can legally tow these compact excavators, with capacity to spare.
1.5 to 2.5 tonnes (1,500-2,500kg): This weight range is the sweet spot for landscapers. Machines like the Kobelco SK17SR, Kubota U17-3, or Yanmar ViO20 deliver genuine capability in a transportable package. These mid-range excavators dig 2.3-2.5 metres deep, yet remain light enough that a 3,500kg ATM trailer setup keeps the combination under Class C licence limits with proper margins.
2.5 to 4 tonnes (2,500-4,000kg): This weight class is where excavator transport gets serious. Machines like the Kobelco SK35SR, Kubota KX033-4, or Cat 303.5 fall into this substantial category. Operators need a proper plant trailer rated to 4,500-5,000kg ATM minimum, electric brakes become mandatory on all wheels, and the tow vehicle needs real towing capability rather than a marketing brochure’s “maximum towing capacity” that assumes an empty tray.
4 to 6 tonnes (4,000-6,000kg): This range represents the upper end of “mini” excavators. The Kobelco SK55SRX, Kubota U55-4, and Cat 305 live in this heavyweight category. These larger machines push the boundaries of what operators can legally tow without a heavy vehicle licence, and many in this class should consider professional machinery transport rather than DIY hauling. For help deciding between size classes, see our comparison of mini excavators vs larger models.”
Quick sidebar about tow vehicle ratings: that “3,500kg maximum towing capacity” your HiLux manufacturer quotes is under ideal conditions with an empty tray, no passengers, and no fuel in the tank. Load up 400kg of tools, a spare set of buckets, 200kg of materials, and two blokes, and your actual remaining towing capacity drops to around 2,700-2,900kg. Always calculate from real-world loaded weight, not factory specs designed to win comparison tests.
NSW Licence Requirements for Towing Mini Excavators
Here’s where many owner-operators get confused and where the fines start adding up. Transport for NSW administers driver licensing and vehicle registration requirements, including the Class C, LR (Light Rigid), and MR (Medium Rigid) licence categories that determine what combination of tow vehicle and trailer you can legally operate. The licence rules aren’t complicated once you understand the thresholds, but the rules aren’t intuitive either.
What You Can Tow on a Standard Car Licence
A Class C licence (your standard car licence) lets you drive any vehicle with a Gross Vehicle Mass (GVM) up to 4.5 tonnes while towing a trailer with a GVM up to 9 tonnes, subject to the tow vehicle’s capacity and manufacturer limits, as long as the towing vehicle can legally handle that trailer’s actual loaded weight.
Gross Vehicle Mass refers to the maximum loaded weight a vehicle is designed to carry, including the vehicle itself, fuel, driver, passengers, and cargo. This GVM figure is the critical number that determines licence requirements and trailer selection. You’ll find your vehicle’s GVM on the compliance plate, usually inside the driver’s door frame or on the firewall under the bonnet.
While the trailer GVM limit of 9 tonnes sounds generous, in practice, your light vehicle manufacturer’s towing capacity will be the limiting factor for most mini excavator transport scenarios. Here’s another important catch: if your combined vehicle and loaded trailer weight (called the Gross Combination Mass or GCM) exceeds the 4.5 tonne threshold, you’re legally required to travel at no more than 100km/h regardless of the posted speed limit. That speed restriction is NSW Road Rule 25-1(3), which applies on every road, including motorways.
P1 provisional licence holders face a 250kg unloaded (tare) trailer weight restriction under NSW towing regulations. Since the lightest suitable plant trailers weigh 600-900kg empty, P1 drivers cannot tow mini excavators legally. P1 drivers need to upgrade to P2 (minimum 12 months on P1) or full licence, or hire a tilt tray for transport.
When You Need a Heavy Vehicle Licence
The Light Rigid (LR) licence kicks in when your tow vehicle exceeds the 4.5 tonne GVM threshold but stays under 8 tonnes. The LR requirement typically occurs when you’re running a larger cab-chassis truck as your tow vehicle, such as an Isuzu NPS 75-155, Hino 300 Series, or Fuso Canter, depending on the variant.
Getting an LR licence in NSW requires: holding a Class C licence for at least 12 months, passing a heavy vehicle knowledge test (currently $57 at Service NSW, though fees may change), completing practical training with an accredited provider (costs vary, typically $400-600 for an LR course), and passing the practical driving test (currently $70, fees subject to change).
Total LR licence cost: approximately $550-750 and 2-3 days of your time, depending on training provider rates. The LR upgrade is worth the investment if you’re regularly moving 4-5 tonne machines or running a larger service vehicle. Verify current fees with Service NSW before budgeting.
The Medium Rigid (MR) licence covers two-axle vehicles with a GVM over 8 tonnes. Most operators are unlikely to need MR for mini excavator transport unless operating a dedicated truck-and-trailer combination or a heavy tilt-tray.
A Worked Example: Can Your Ute Handle Your Excavator?
Let’s run the actual numbers for a common scenario that catches many operators.
Your setup: Toyota HiLux SR5 dual cab with tare weight of 2,070kg, GVM of 3,200kg, towing capacity of 3,500kg, and GCM of 6,000kg. Tandem axle plant trailer with tare weight of 900kg and ATM of 3,500kg. Kobelco SK35SR excavator with an operating weight of 3,890kg, including standard bucket.
The weight calculation: Excavator at 3,890kg plus trailer tare at 900kg equals total trailer weight of 4,790kg.
The verdict: This combination exceeds the trailer’s 3,500kg ATM rating by 1,290kg, nearly 37% over the limit. This setup is illegal, regardless of your licence class. The fines for exceeding trailer mass limits vary by the degree of breach, plus demerit points may apply. At 37% over, you’re looking at substantial penalties and potential loss of registration.
What you actually need: A plant trailer rated to at least 5,500kg ATM, giving 15% safety margin, and a tow vehicle with at least 5,000kg towing capacity. Something like an Isuzu D-Max SX with 3,500kg towing but 6,000kg GCM limit still won’t cut the requirements. You need a cab-chassis truck or a professional tilt tray for this machine.
Reality check: this trailer overloading situation catches people all the time. The ute “can tow 3,500kg”, and the trailer “is rated to 3,500kg,” so the combination seems fine. But the excavator plus trailer weighs nearly 5 tonnes combined. Always add the excavator weight and the trailer tare weight, then check that the total is within both the trailer ATM and the vehicle towing capacity. The lower number is your legal limit.
Chain of Responsibility: Your Legal Obligations Explained
The Heavy Vehicle National Law (HVNL) governs the operation of vehicles with a GVM above 4.5 tonnes across NSW, Queensland, Victoria, South Australia, Tasmania, and the ACT, establishing consistent standards for mass, dimensions, and load restraint. But here’s what matters to you as an excavator operator: even if you’re driving a light vehicle under that threshold, you can still be caught by Chain of Responsibility if your actions contribute to a heavy vehicle breach. For example, if you load an excavator onto someone else’s truck incorrectly.
Who Is Responsible Under Chain of Responsibility?
The National Heavy Vehicle Regulator (NHVR) oversees compliance with the Heavy Vehicle National Law, providing guidance on Chain of Responsibility obligations and load restraint requirements for operators across participating states. Under CoR (the industry shorthand for Chain of Responsibility), responsibility isn’t limited to the driver. If you’re involved in any part of the transport task, you can be held liable as a responsible party.
The responsible parties include the driver (obviously, but not exclusively), the loader (whoever physically secured the excavator to the trailer), the consignor (the business or person sending the equipment), the scheduler (whoever set the pickup and delivery times that might encourage rushing), and the operator (the business controlling or influencing the transport).
If you’re an owner-operator running your own excavator to your own jobs, you’re potentially all five of these parties simultaneously. That means multiple liability exposures for a single transport task, and inspectors can, in theory, issue separate penalties for each role.
The law requires you to take “all reasonable steps” to prevent breaches. In practical terms, reasonable steps mean proper training (even if informal, document the training), appropriate equipment (chains and binders rated for your loads), documented procedures (a simple checklist counts as documentation), and actually following procedures consistently.
What Penalties Apply for Non-Compliance?
Here’s where the penalty amounts get your attention. Under the Heavy Vehicle National Law, penalties for Chain of Responsibility breaches are categorised by risk level. Minor risk breaches attract penalties at the lower end of the scale. Substantial risk breaches attract significantly higher penalties. Severe risk breaches can cost individuals tens of thousands of dollars and substantially more for corporations.
Court-imposed penalties can be considerably higher than infringement notices for the most serious offences, such as an improperly secured excavator causing a fatal accident. The exact penalty amounts are indexed annually and vary depending on the specific offence, so check the current NHVR Schedule of Penalties for precise figures before assuming what a breach might cost you.
Important note: many tradies think CoR only applies to trucks, semis, and B-doubles. That assumption is wrong. If your improperly secured excavator falls off a trailer and causes an accident, even if you’re towing with a ute and the total combination is under the threshold, every party in the chain gets investigated. The fact that you were “just moving the machine 15 minutes down the road to the next job” doesn’t reduce your liability one cent.
The good news? Demonstrating compliance isn’t complicated or expensive. Use proper restraints (a quality chain set costs $200-400 and lasts 10+ years), follow the Load Restraint Guide (free PDF from the National Transport Commission), document your procedures (a laminated checklist on the trailer costs $15), and inspect your equipment before each use (takes 3-5 minutes). Do those steps consistently, and you’ve met the “reasonable steps” threshold.
Choosing the Right Trailer for Your Mini Excavator
Your trailer needs to do three things: legally carry the weight, safely accommodate the machine’s dimensions, and meet the brake and safety requirements for its GTM class. Get any of these requirements wrong, and you’re either illegal, unsafe, or both.
Trailer Types: Which Suits Your Needs?
Tandem axle trailers (two axle sets) are the workhorses for smaller excavators. Two axles distribute weight better than a single axle, reducing tyre stress and improving stability during transport. Tandem trailer capacities typically range from 2,000kg to 3,500kg ATM, with prices from $3,500 for a basic box trailer with ramps to $8,000-12,000 for a purpose-built plant trailer from manufacturers like Southwest Trailers or Sureweld. Tandem trailers are adequate for machines up to about 2,500kg in the 1.7-tonne excavator class.
Plant trailers (also called equipment trailers) are purpose-built for machinery transport. Plant trailers feature heavy-duty steel construction (4-6mm floor plate versus 2-3mm on box trailers), wider decks (typically 1,800-2,100mm versus 1,500mm), built-in fold-down or slide-out ramps, and multiple rated tie-down points welded to the chassis. Plant trailer capacities range from 3,500kg to 4,500kg ATM, covering most mini excavators in the 2-4 tonne class. Expect to pay $12,000-20,000 for a quality plant trailer from Southwest, Sureweld, or Dean Trailers in Sydney. Prices vary by supplier and specifications, so obtain current quotes.
Tilt trailers use hydraulics to tilt the entire deck, eliminating the need for loading ramps. The excavator drives straight on as the tilt deck meets the ground at approximately 10-12 degrees. Tilt trailers are convenient, with loading taking 3-5 minutes versus 8-12 minutes with ramps, but they cost $8,000-15,000 more than equivalent fixed-deck trailers and require additional maintenance, including hydraulic system service every 12 months.
For most NSW tradies running excavators in the 1.7 to 3.5-tonne range, a quality fixed-deck plant trailer with 4,000-4,500kg ATM capacity hits the sweet spot between capability and cost. Budget $15,000-18,000 for a plant trailer that’ll last 15-20 years with basic maintenance, though prices change with market conditions.
Calculating the Right Trailer Capacity
Never buy a trailer that “just fits” your excavator’s weight. You want a 20-30% safety margin between your loaded weight and the trailer’s Aggregate Trailer Mass (ATM) rating, which is the maximum weight the trailer can legally carry when loaded.
Why the 20-30% capacity margin matters: Attachments vary in weight, with a GP bucket weighing 85kg but a hydraulic grab weighing 280kg. You’ll occasionally carry spare buckets, fuel cans, tools, or materials. Wet mud on the tracks adds 50-150kg you didn’t plan for. Weight distribution affects handling, and the margin lets you position the excavator for optimal tongue weight. ATM ratings assume perfect conditions with new tyres and properly serviced bearings.
If your excavator weighs 2,500kg with a standard bucket, look for a trailer rated to at least 3,200kg ATM (28% margin). That margin gives you room for a heavier attachment, a spare bucket, and 100kg of materials without pushing into the illegal overload zone.
Trailer Brake and Safety Requirements
NSW trailer brake requirements are based on Gross Trailer Mass (GTM), which is the maximum weight the trailer can carry when connected to the tow vehicle and with some weight transferred to the tow ball.
For trailers with a GTM between 0-750kg, no brakes are legally required, but if brakes are fitted, they must work properly.
For trailers with a GTM between 751 and 2,000kg, brakes are required on at least one axle. Override (surge) brakes are acceptable in this weight range. Surge brakes activate when the trailer pushes against the tow vehicle during braking.
For trailers with GTM between 2,001 and 4,500kg, electric brakes are required on all wheels, activated by a brake controller in the tow vehicle. Budget $150-300 for a basic brake controller like the Tekonsha Voyager, or $400-600 for a proportional unit like the Tekonsha P3, which automatically adjusts braking force.
For trailers over 2,000kg GTM, an automatic breakaway system is mandatory. The breakaway system is a small battery ($80-120) and actuator that activates trailer brakes automatically if the trailer separates from the tow vehicle. Without a working breakaway system, your loaded trailer becomes an uncontrolled projectile on the road.
That breakaway system isn’t optional, negotiable, or something you can “install later.” If your plant trailer over 2 tonnes GTM doesn’t have a working breakaway system, that trailer isn’t legally roadworthy, regardless of how good your hitch setup looks or how expensive the trailer was.
Honest assessment about cheap trailers: cheap trailers from no-name importers on eBay often skimp on braking systems. We’ve seen 4,500 kg-rated trailers with no provision for electric brakes, no breakaway system, and undersized axles. That “bargain” isn’t legal for carrying a 2-tonne excavator, and that trailer certainly isn’t safe. You’re not saving money. You’re buying a liability and a fine waiting to happen.
Load Restraint Requirements: Chains, Straps, and Standards
The National Transport Commission’s Load Restraint Guide sets out the performance standards for securing loads on Australian roads, requiring restraints capable of withstanding forces of 0.8g forward, 0.5g rearward, and 0.5g sideways. Those g-force numbers aren’t arbitrary values invented by bureaucrats. Those are the actual forces your tie-downs need to handle during emergency braking, hard acceleration, and sudden swerves.
Understanding the Load Restraint Performance Standards
In plain English: your restraints need to stop your excavator sliding forward with a force equal to 80% of the excavator’s weight if you brake hard, and 50% of the weight if you swerve or accelerate suddenly.
Here’s what those force calculations mean practically. A 3,000kg excavator generates 2,400kg of forward force under emergency braking (3,000 × 0.8). If your restraints can’t handle that forward load, the excavator shifts forward, potentially into the cab of your ute, through your rear window, or off the front of the trailer into oncoming traffic.
The sideways force is 1,500kg (3,000 × 0.5). That’s what happens when you swerve to avoid a hazard or take a roundabout too fast. Understeer occurs, the excavator slides, and the trailer tips.
The performance standards (the technical term from Heavy Vehicle National Regulation Schedule 7) are what actually matter legally. The Guide provides methods to achieve the standards, but the end result of a load that doesn’t shift dangerously is what you’re responsible for demonstrating.
How Many Tie-Downs Do You Actually Need?
For mini excavators under 4,500kg, the minimum requirement under the Load Restraint Guide is two tie-downs on the machine body (typically front and rear of undercarriage), plus one additional restraint on the boom/bucket assembly to prevent articulating parts from swinging during transport.
Machines over 4,500kg require a minimum of 4 tie-downs (one at each corner of the undercarriage) plus boom/bucket restraint.
But minimums are exactly that: minimums designed for ideal conditions with new equipment, perfect chain angles, and no dynamic forces beyond the standards. For a 3-tonne excavator, I’d use four tie-downs on the body regardless of the minimum threshold. The extra 8-10 minutes adds a significant safety margin, and nobody has ever been fined for being over-restrained. The extra $50 in chains is cheap insurance.
Chain Grades and Working Load Limits Explained
Not all chains are equal in strength. Transport chains are rated by grade, a measure of steel alloy strength, and you need the right grade chain for the job.
Grade 70 (Transport Chain): Grade 70 is the standard for load restraint, made from carbon steel and heat-treated for strength. Recognisable by the “70” or “G70″ stamp on links. A 10mm (3/8″) Grade 70 chain has a Working Load Limit (WLL) of 3,000kg. A 13mm (1/2”) Grade 70 chain has 5,300kg WLL. Grade 70 chain cost is approximately $8-12 per metre for 10mm, available from Total Tools, Blackwoods, or bearing/chain specialists. Prices vary by supplier.
Grade 80 (Alloy Chain): Grade 80 is stronger and approximately 20% lighter than Grade 70 for the same strength, made from alloy steel. The same 10mm diameter has a WLL of around 3,200kg. Grade 80 is more expensive ($12-18 per metre), but it’s worth the extra cost if you’re handling chains regularly, since the weight difference adds up over multiple loading cycles per week.
Working Load Limit (WLL) calculation: Your combined restraint WLL must equal at least 50% of the load weight when chains are attached at appropriate angles. For a 3,000kg excavator, you need a minimum combined WLL of 1,500kg. Two 10mm Grade 70 chains (3,000kg WLL each) give you 6,000kg combined, well over the minimum, with margin for non-ideal chain angles.
Chain Recommendations by Excavator Weight
For a 1,500 kg excavator requiring a minimum WLL of 750 kg, use 2 × 8mm G70 chains (2,000 kg each). A set costs approximately $80-120.
For a 2,500 kg excavator requiring a minimum WLL of 1,250 kg, use 2 × 10mm G70 chains (3,000 kg each). A set costs approximately $120-180.
For a 3,500 kg excavator requiring a minimum WLL of 1,750 kg, use 4 × 10mm G70 chains (3,000 kg each). A set costs approximately $200-300.
For a 5,000 kg excavator requiring a minimum WLL of 2,500 kg, use 4 × 13mm G70 chains (5,300 kg each). A set costs approximately $350-500.
All prices are approximate and vary by supplier. Obtain current quotes before purchasing.
Warning about hardware store chains: Hardware store chains without grade markings or WLL ratings aren’t suitable for transport restraint. Those “heavy-duty” chains in the Bunnings bargain bin for $4/metre have no certification, no known strength, and no legal compliance. The package says “not for lifting or load securing”, so read the fine print before buying. Buy a proper transport-rated chain from Total Tools, Blackwoods, or a dedicated chain supplier like Bale Defence or William Adams.
Always inspect chains and binders before each use. Inspection takes 60-90 seconds. Check chains for stretched links (link length increased by more than 3%), cracks or gouges (any visible crack means discard immediately), corrosion (surface rust is fine, but deep pitting weakens the chain), and wear on link edges (if worn more than 10%, replace the chain).
The same inspection applies to hooks. If the safety latch doesn’t spring closed, the hook isn’t fit for purpose. Load binders with bent handles, worn threads, or difficult operation get thrown out. A $60 replacement binder is cheaper than a fine or causing an accident.
Step-by-Step: Loading and Securing Your Mini Excavator
This section is where theory meets practice. Following a consistent process every time isn’t just about compliance. Consistent procedure is about not having your excavator slide off the trailer on the M5 during morning traffic when the bloke in front panic-brakes.
Before You Load: The Pre-Transport Checklist
Before you even start the excavator’s engine, budget 10-15 minutes for this pre-loading checklist. Don’t skip these steps.
Trailer preparation: Park on firm, level ground such as concrete, compacted gravel, or sealed hardstand. Soft ground causes trailers to tilt during loading, increasing the risk of rollover. Chock the trailer wheels with proper wheel chocks ($15-30 from Supercheap Auto), not random bits of timber that can slip. Apply the tow vehicle parking brake firmly and leave the vehicle in Park (auto) or gear (manual). Engage the trailer handbrake override lever, if equipped, to prevent the trailer from rolling while you’re loading. Walk around and check the trailer lights, tyre condition (look for cracks, bulges, and tread depth above 1.6mm), wheel nuts, and any visible structural damage. Extend and secure loading ramps. Check ramps are rated for your excavator’s track loading. A 3-tonne excavator concentrates approximately 1,500kg on each track, so ramps need at least 2,000kg per-ramp capacity.
Equipment check (3-5 minutes): Lay out tie-down chains and verify binders operate smoothly. Seized binders are useless for proper tensioning. Confirm you have enough restraints: minimum 2 chains plus a boom strap for machines under 4,500kg, and 4 chains plus a boom strap for heavier excavators. Check chains for damage. Any stretched, cracked, or severely corroded links mean the chain isn’t being used.
Personal safety: Wear a high-visibility vest or shirt ($15-25 from Workwear Warehouse). Wear steel-cap safety boots since you’re working around thousands of kilograms of moving machinery. Clear the area of bystanders, especially kids. Establish a 5-metre exclusion zone around the loading area. If working near traffic, set up warning signs or cones 20-30 metres before the loading area.
Loading Your Excavator Safely
Loading takes 8-15 minutes, depending on experience. First-timers should budget 20-25 minutes and go slowly. Rushing the loading process causes mistakes.
Step 1: Start the excavator and let the engine idle for 60-90 seconds to build hydraulic pressure. Cold hydraulics respond sluggishly to controls.
Step 2: Drive slowly toward the trailer, tracking straight. Line up the excavator’s centreline with the trailer’s centreline. Being 100mm offline at the ramps becomes 300mm offline on the deck, potentially enough misalignment to tip the trailer.
Step 3: Approach the ramps at walking pace (approximately 2km/h). Keep the boom low, no higher than cab height, for stability during the climb. The bucket should be curled back toward the machine, not extended forward.
Step 4: Drive up the ramps smoothly without stopping if possible. Stopping mid-ramp and restarting creates jerky loading, which can cause loss of control. If you must stop on the ramps, engage the slew brake before releasing the travel levers.
Step 5: Drive the excavator forward until the blade (dozer blade at the front) is approximately 300-500mm from the trailer headboard or gooseneck. This position places the machine for optimal tongue weight distribution.
Tongue weight target: 10-15% of the loaded trailer weight should sit on the tow ball. For a 4,000kg loaded trailer (900kg trailer + 3,100kg excavator), you want 400-600kg on the ball. Too little tongue weight (under 8%) causes dangerous trailer sway at highway speeds. Too much tongue weight (over 15%) overloads the vehicle’s rear suspension and lifts the front wheels, reducing steering control.
If you’re unsure about tongue weight, a tow ball scale costs $50-80 from Supercheap Auto and removes the guesswork. Alternatively, check that the tow vehicle’s rear suspension compresses noticeably, but the headlights still point forward, not up at the sky.
Securing the Machine: Where and How to Attach Restraints
Every excavator has manufacturer-specified tie-down points, usually heavy-duty eyes or slots welded to the undercarriage frame, near the blade mounting, and at the rear of the track frame. Check pages 8-12 of your excavator’s manual for exact tie-down locations. Using any other attachment point (like wrapping chains over the rubber tracks or around hydraulic cylinders) risks damage to components and may not provide adequate restraint. Chains can slip during dynamic loading during emergency braking.
Attachment sequence (15-20 minutes, faster with practice):
First, attach rear restraints. Attach chains to the rear undercarriage tie-down points (usually one each side, near the back idler wheel). Run chains to the rear trailer D-rings, crossing over in an X pattern if possible, with the rear-left excavator to the rear-right trailer and vice versa. The X-pattern prevents both forward and rearward movement.
Second, attach front restraints. Attach chains to the front tie-down points, typically on the blade frame or the front of the track frame near the sprocket. Run front chains to the forward trailer D-rings, again crossing if space permits.
Third, tension with binders. Install ratchet binders (also called load binders or chain tensioners) on each chain. Ratchet-style binders ($45-80 from Total Tools) provide controlled tensioning, so you can feel when you’ve reached the appropriate level. Lever binders ($30-50) are faster but require more skill to set the correct tension without over-tightening.
Fourth, secure the boom and bucket. Lower the boom, extend the stick (arm) slightly, and curl the bucket so the bucket rests on the trailer deck. Run a heavy-duty ratchet strap (50mm width, 2,500kg LC minimum, approximately $30-50 from Blackwoods) over the boom or stick, attaching to trailer D-rings on each side. The boom strap prevents the boom from articulating during transport, even if the hydraulic lockout fails.
Fifth, complete the final steps. Engage the hydraulic lockout lever (to prevent any boom/slew movement), shut down the engine, remove the key, and turn the battery isolator to OFF (to prevent accidental startup or hydraulic activation).
Chain angle matters for restraint effectiveness. For tie-down restraint, aim for a minimum angle of 30° from the horizontal. Steeper angles provide better clamping force on the load. Chains running nearly flat (under 30 degrees) provide minimal downward force, allowing the excavator to “hop” over bumps. Very steep angles (approaching 90 degrees) provide maximum clamping force but less horizontal restraint. The goal is to balance adequate clamping force with restraint against forward, backwards, and sideways movement.
Final Checks Before You Hit the Road
Walk around the entire setup. The walkaround takes 3-5 minutes but catches mistakes.
Verify that all chains are tensioned and that the binder handles are secured by flipping the handles fully over and checking that they are locked. Confirm no chains are rubbing on hydraulic hoses, electrical wires, or rubber tracks. Test boom, arm, and bucket security by trying to move the boom by hand. The boom shouldn’t budge. Confirm the battery isolator is OFF. Verify ramps are raised and locked in transport position. Test the trailer lights by having someone stand behind you while you check the brake lights and indicators. Confirm nothing is loose on the trailer deck, and that buckets, tools, and pin packs are secured or removed. Verify that the trailer coupling is locked and that the safety pin is inserted. Confirm safety chains are crossed under the coupling and attached to the tow vehicle.
Critical step: Re-check restraints after the first 25km. Pull over in a safe location such as a servo, rest stop, or wide verge and check every restraint. Chains settle and lose tension as components bed in against each other. Binders can work loose from vibration. This re-check isn’t paranoia. The re-check is standard industry practice and what the Load Restraint Guide explicitly recommends. We’ve personally caught two loose chains at that first stop that would have been serious problems 50km down the freeway.
When to Hire a Tilt Tray Instead
Sometimes the smart move is letting someone else handle the transport. A tilt tray truck features a hydraulically tilting flatbed that lowers to ground level, allowing mini excavators to be driven directly onto the deck without ramps, making tilt tray the preferred choice for professional machinery transport.
When Does Professional Transport Make Sense?
Heavier machines (over 4 tonnes): Once you’re above 4,000kg, the trailer and tow vehicle requirements become substantial. You need a heavy-duty trailer and a capable tow vehicle, often a cab-chassis truck. If you’re only moving the machine 6-10 times per year, professional transport at typical rates of $200-400 per move is far more economical than owning specialised equipment.
Long distances (over 100km): Towing a heavy load for 2+ hours is physically tiring and increases accident risk. Professional drivers do this 8-10 hours daily and have appropriate vehicles with proper suspension, braking, and mirrors. For a 300km move, the professional cost includes their insurance, their fuel, and their time, plus you get back 5-6 hours of your day.
Tight access sites: Getting a trailer into a cramped residential block in Sydney’s inner west or a steep driveway in the Blue Mountains is often harder than the excavator work itself. A tilt tray can drop and load in spaces you couldn’t manoeuvre a 6-metre trailer combination. The truck drives forward, tilts, loads, and drives out forward.
No suitable equipment: If you don’t own an appropriate trailer, buying one or hiring one for occasional moves rarely makes economic sense versus tilt tray hire. If you’re weighing up ownership costs, our mini excavator buying guide for Australia covers the full financial breakdown. Do the maths: at $250 per tilt tray move, a $15,000 trailer takes 60 moves to break even, which is 2-3 years for most operators.
New, expensive, or financed machines: Professional transport includes insurance coverage, typically $1-5 million liability plus goods in transit. If your excavator is worth $80,000-150,000 and the machine is financed, the extra cost for insured professional transport buys peace of mind that DIY hauling doesn’t provide.
What Does Tilt Tray Hire Cost in Sydney?
Prices vary by distance, machine size, demand, and provider. The following ranges are indicative only. Always obtain current quotes from multiple providers and confirm pricing for your specific requirements. Regional variations apply.
Local moves (under 30km): For a 3-tonne capacity tilt tray, expect typically $180-280. For a 5-tonne capacity, typically $220-350. For an 8-tonne capacity for larger minis, typically $280-450.
Metropolitan Sydney (30-60km): For a 3-tonne capacity, typically $250-380. For a 5-tonne capacity, typically $300-450. For an 8-tonne capacity, typically $380-550.
Regional NSW (per km beyond metro): Standard rates typically range from $3.50 to $ 5.50/km. For a move from Sydney to Canberra (280km), expect $700-1,000. Sydney to Newcastle (160km), expect $450-700. Sydney to Wollongong (80km), expect $300-450. Check local conditions and obtain quotes for accurate pricing.
Where to book tilt tray hire in Sydney: Select Tilt Tray Group in Smeaton Grange at (02) 9545 3464 is good for the south-west Sydney and Macarthur region. Total Tilt Trays at 0407 212 131 has a large fleet and can usually accommodate same-day bookings. iSeekplant is an online marketplace where you can compare multiple providers and get quotes within hours.
For a typical move of a 3-tonne excavator from Smeaton Grange to a job site in Campbelltown (15km), you’re looking at approximately $180-220 door to door based on typical rates. Compare that tilt tray cost against your time (1.5-2 hours, including loading/unloading), fuel, and wear on your own equipment. For a one-off move, the tilt tray often wins economically.
When booking a tilt tray, confirm the operator: holds appropriate licences and substantial public liability insurance, understands Chain of Responsibility obligations (ask the operator directly, and if they don’t know what CoR means, choose someone else), has a truck rated for your excavator’s weight with 20% margin, and can access both pickup and delivery locations without blocking traffic or damaging property.
STM Trucks & Machinery doesn’t offer transport services directly, but our team works with several reliable tilt tray operators in the Sydney, Southern Highlands, and South Coast areas. Call our Smeaton Grange location on (02) 4647 4488, and we can point you toward operators we trust.
Common Transport Mistakes and How to Avoid Them
After decades in the machinery business, experienced operators have seen every transport mishap imaginable: excavators through rear windows, trailers fishtailing on the Hume Highway, machines falling off on roundabouts, and countless near-misses. Here’s what goes wrong most often and how to avoid becoming a cautionary tale.
Overloading the trailer: People calculate based on the trailer’s marketing claims rather than its actual ATM rating. Or operators forget to add attachment weights, where that 180kg breaker pushes a “borderline legal” load into definitely illegal territory. Or operators load wet, mud-caked tracks that add 50-100kg nobody planned for. Fix: Always calculate total loaded weight against the rated ATM, not “near enough is good enough.” Weigh the trailer loaded if you’re unsure. Public weighbridges cost $15-25 per weigh.
Insufficient tie-downs: Two chains on a 3-tonne excavator meet the technical minimum, but many operators use exactly two chains, positioned poorly (both on the same side, or both at the front), without boom restraint. The machine shifts in the first hard brake. Fix: Use four chains regardless of the minimum threshold. Add the boom strap. The extra 10 minutes and additional chain cost is cheap insurance.
Wrong chain grade or worn equipment: Unmarked hardware store chains, rusty links, bent hooks, or binders that don’t lock properly cause restraint failures. One customer told me he’d been using the same chains for “20-odd years”, and those chains were stretched, corroded, and probably had less than half their original strength. Fix: Buy a proper Grade 70 or 80 transport chain. Inspect chains before every use. Replace anything questionable. A $60 replacement chain is cheaper than a fine or causing an accident.
Not locking hydraulics: The boom swings during transport if the hydraulic lockout isn’t engaged. That swinging arm creates dynamic forces your tie-downs weren’t calculated for, and the swinging boom can smash cab windows, damage the trailer, or cause loss of control. Fix: Engage the hydraulic lockout lever before leaving the machine. Check the lockout is actually engaged by trying to move the controls. The controls should be completely immobile.
Poor weight distribution: Loading the excavator too far back (under 8% tongue weight) causes terrifying trailer sway at higher speeds. Loading too far forward (over 15% tongue weight) overloads the tow ball and lifts the front wheels. I’ve seen HiLuxes with front wheels barely touching the ground, trying to tow overloaded trailers. Neither situation is safe at highway speeds. Fix: Position the excavator for 10-15% tongue weight. Use a tow ball scale or check visually that the tow vehicle sits level.
Forgetting to re-check: Chains loosen in the first 20-25km as loads settle and components bed in. Skipping that first stop is gambling with everyone on the road. Fix: Set a phone reminder. Pull over at the first safe location after 25km and re-tension everything.
Driving too fast for conditions: A tow vehicle handling well at 80km/h becomes unpredictable at 110km/h, especially with a heavy trailer in crosswinds or on wet roads. The 100km/h limit for combinations over the GCM threshold exists for engineering reasons. Physics doesn’t care about your schedule. Fix: Stay under 100km/h. Drop to 80km/h in rain, wind, or heavy traffic. Arrive alive.
Frequently Asked Questions
What Trailer Do I Need to Transport a Mini Excavator?
The trailer you need depends on your mini excavator’s weight class. For machines under 2 tonnes, a tandem-axle trailer with a 3,000-3,500kg ATM capacity is adequate. For 3-5 tonne excavators, you’ll need a heavy-duty plant trailer rated at 4,500-5,500kg ATM, with electric brakes on all wheels and an automatic breakaway system.
For excavators under 1.5 tonnes, the minimum trailer capacity is 2,500kg ATM with brakes optional if under 750kg GTM. A Class C licence is typical, and new trailer costs range from $5,000-8,000.
For excavators from 1.5-2.5 tonnes, the minimum trailer capacity is 3,500kg ATM with brakes required on at least one axle. A Class C licence is typical, and new trailer costs range from $8,000-12,000.
For excavators weighing 2.5-4 tonnes, the minimum trailer capacity is 5,000kg ATM, with electric brakes on all wheels and a breakaway system. A Class C licence is typical, and new trailer costs range from $15,000-20,000.
For excavators from 4-6 tonnes, the minimum trailer capacity is 7,000kg+ ATM with electric brakes on all wheels plus a breakaway system. An LR licence may be required, and new trailer costs range from $20,000-28,000.
Always check your specific tow vehicle’s capacity and confirm the combined weight stays within both the trailer’s ATM and your vehicle’s towing capacity. The lower number is your legal limit. A trailer rated to handle the weight doesn’t help if your ute can’t legally tow that trailer. Prices are indicative only and subject to change. Verify current pricing with suppliers.
How Do You Tie Down a Mini Excavator on a Trailer?
Secure a mini excavator using at least two tie-downs on the machine body (front and rear of the undercarriage) for machines under the 4,500kg threshold, plus an additional restraint on the boom to prevent articulation. Use Grade 70 or Grade 80 chains with 10mm for machines under 3 tonnes and 13mm for heavier machines, attached to manufacturer-specified tie-down points on the excavator frame. The combined Working Load Limit of all chains must equal at least 50% of the machine’s weight.
Find the tie-down points in your excavator’s operation manual, typically pages 8-12. The tie-down points are usually welded eyes or slots on the undercarriage frame near the blade and at the rear track frame. Avoid wrapping chains over the rubber tracks (damages track pads and chains can slip) or around hydraulic components (damages hoses and doesn’t provide rated attachment).
Use ratchet binders for controlled tensioning. Chains should be snug enough that the machine can’t shift (test by pushing firmly on the excavator; it shouldn’t move), but not so tight that you’re deforming the rubber track pads or straining the frame. Chain angles should be at least 30 degrees from horizontal for effective clamping force, with steeper angles generally providing better results for tie-down restraint applications.
Do I Need a Special Licence to Tow a Mini Excavator in NSW?
Most mini excavators can be towed on a standard Class C (car) licence, provided your tow vehicle’s GVM doesn’t exceed the 4.5 tonne threshold. However, if your Gross Combination Mass exceeds this threshold, NSW Road Rule 25-1 requires you to travel at no more than 100km/h regardless of posted speed limits.
You’ll need a Light Rigid (LR) licence if your tow vehicle’s GVM exceeds the threshold. This typically applies to cab-chassis trucks like the Isuzu NPS, Hino 300 Series, or Fuso Canter rather than utes. Getting an LR licence costs approximately $550-750 total (including training, knowledge test, and practical test, though fees may change) and takes 2-3 days.
Check your specific setup before assuming compliance. The combination of vehicle GVM, trailer ATM, and actual loaded weight determines what’s legal, not any single component alone. Verify current licence requirements and fees with Transport for NSW.
Bottom Line
Transporting a mini excavator safely comes down to three things: knowing your weights precisely (machine weight from the manual, trailer tare weight from the compliance plate, combined total calculated honestly), meeting load restraint requirements (Grade 70 or 80 chains at 50% of load weight minimum, four tie-downs recommended for any machine over 2.5 tonnes, proper boom restraint), and understanding your Chain of Responsibility obligations under the Heavy Vehicle National Law. Get these three elements right, and you protect your equipment, stay compliant, and avoid the significant fines that catch out operators who’ve always done things “their way.”
Before your next transport, spend 20 minutes on preparation: check your excavator’s actual operating weight in the manual (don’t guess or rely on memory), verify your trailer’s rated ATM genuinely matches your needs with a 20-30% margin, and inspect your chains, binders, and straps for wear. Any stretched links, cracked welds, or seized binders mean replacement before use, not “she’ll be right for one more trip.”
Final disclaimer: This guide provides general information based on regulations current at the time of writing. Fees, penalty amounts, and regulatory requirements change over time. Always verify current requirements with Transport for NSW, the NHVR, and other official sources. Prices quoted are indicative only and vary by supplier, location, and market conditions. This guide does not constitute legal or professional advice. Individual circumstances vary significantly, and readers should seek professional advice for their specific situations. Need help selecting the right mini excavator or transport equipment for your business? STM Trucks & Machinery has been helping NSW tradies and landscapers for over 50 years. Our team can advise on Kobelco excavators, trailer options from brands we trust, and the chains and restraints you need to move equipment safely.